Do we need school to learn?

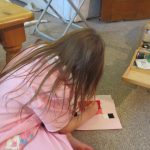
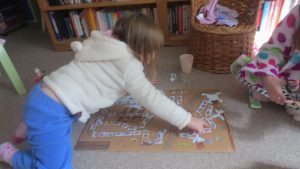
At the beginning of every September, I ask the girls if they have anything they would like to achieve by the end of July.  Anna (who was 5) said she’d like to learn to read.

I helped with this by teaching her blending sounds and split digraphs which we worked on until Christmas last year.  This was to give her the basics.  She already knew that letters have a sound and a name (ay or a, bee or b, etc).

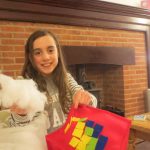
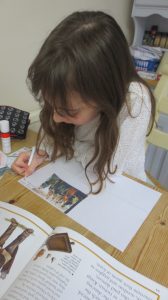
After this, we started reading simple books. moving on to reading programs such as Oxford Reading Tree which we bought, but also got different ones from the library (one of our favourite places to go).   By July she was on Level 5 books.

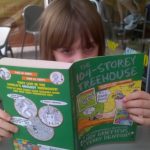
I have no idea the ‘comparison’ with schooled children, but this child has pretty much taught herself to read fluently.  As of now (August) she is reading Liz Pichon (Tom Gates) and Andy Griffith (13 Storey Treehouse Stories).

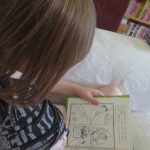
To continue with her gaining confidence in reading alone, we now all read for half an hour a day (or more if you want to).  So far I have found that instead of picking up a gadget or putting on the television, they have been picking up books to read.

My conclusion after this year, is that if a child wants to learn something they can do it anywhere, given the right encouragement and facility to do so. 🙂

Making our own soap

This year we wanted to make our own gifts for families and one of things we decided to do was make our own soap.

I found this video and thought we’d use this one but amend it a bit.

We bought some goat’s milk soap base and chopped it into cubes ready to melt. We grated some lemons to get the rind.


We melted the soap base over a pan of simmering water. This took quite a while.


We then mixed in a few drops of  both lavender and lemon essential oils.

We poured the mixture into our moulds and let them set. removed them from the mould to let the other side set.

Finally, we wrapped them in cling film to prevent them from being affected by the air and then in brown paper with a ribbon.

These looked and smelled lovely and worked perfectly. We will be doing this again.

Minecraft Plushies

One day while looking through our local library we found this book and the girls decided they would like to make a plush cube. (yay measuring and sewing) 🙂

I asked them which one they would like to make.  Elsa decided on the Minecraft parrot and Anna decided on the pig.  I asked them to design them on some squared paper and then work out what and how many materials they would need.  We popped to our local Hobbycraft (brilliant shop btw) and purchased what we needed.

Firstly we measured 6 8x8in squares out of the felt which would be the base colour of the things we’d decided to make.  Pink for Anna and red for Elsa.


We then cut them out and starting to sew them together.  We left the sides which required more detail separate to make it easier to sew.


We then cut out 1x1in squares for the details then pinned them on the base squares. Elsa had face, wings, tail and Anna had face and tail.


They gradually sewed the pieces on and then finally sewing all the base pieces together we left a little gap so we could stuff them.


Then they finished off by sewing up the hole.


The girls did these mostly on their own. It took a little while to complete them as there was a lot to sew, but they completed them.

I think they look great. 🙂

Vikings – An Interesting Topic – Part 1

Each term I ask my girls if there is anything they would like to learn as a topic.  This term they asked about Vikings. There is quite a lot of Viking history in the County we live in so I hit the internet to find a curriculum to base from then we went to the library  to borrow some books and we were ready.

The first thing we talked about was the most obvious. The longboats.  We talked about the history of them, the size, why they had the shields on the outside and why they burned them.  We completed some worksheets about them then made an origami one to finish that part of the topic. We went to Sheringham which had a replica (small), which they set light to in the evening.

IMG_0726 16836196_10212731260181406_3270459094282735075_o IMG_1055

We talked about the different foods they would have eaten, then we made some Viking bread from a recipe we found in one of the books we got from the library. It was very salty 😀

IMG_0714 IMG_0717 IMG_0718 IMG_0719 IMG_0721 IMG_0723 IMG_0724 IMG_0725

Next we talked about weapons and armour.  We visited our local museum where they have an extensive array of weapons and videos which was really interesting.

WP_20170425_005 WP_20170425_006

Then we made a shield and some swords out of card.

IMG_0747 IMG_0748 IMG_0749 IMG_0750 IMG_0751 IMG_0754 IMG_0758 IMG_0759

The display of work we have been doing.  This includes a timeline through history, some research on runes, food, longboats, weapons and armour, and where the Vikings attacked the UK.

IMG_1058


Tie Dyeing T-shirts

We did some tie dye because we have been learning about rainforests and all the colourful birds, flowers and animals that live there.

First we wet our t-shirts in warm water so that the dye would sink in to the t-shirt.

img_0252 img_0253

We twisted our t-shirts into two different patterns.  In this one we have called it a sunflower fold and did it by twisting from the middle.  We had no rubber bands so we used string to stop it from undoing.

img_0254

We made the dye by mixing the dye powder with warm water and salt.  We put the dye in squeezy bottles so it was easy to put the dye on the t-shirts.  Next we dyed our t-shirts by squirting the dye in random places.  We suggest wearing gloves or something on your hands so you don’t end up with colourful hands.

img_0255 img_0256 img_0257 img_0258 img_0259 img_0261 img_0263 img_0264 img_0265 img_0266 img_0268 img_0270 img_0271

We put our t-shirts in a bucket of cold water to set the dye into the cotton.  Then we rinsed them in warm water to get rid of any dye that didn’t soak into the t-shirt.

img_0277 img_0279

Final results.

img_0282 img_0283 img_0284 img_0285

Left to dry on the washing line.

img_0287

We really enjoyed doing this, it was really fun and we had great results.  We didn’t think they would turn out this well but they did.  They look amazing.  We can’t wait to wear them.

Rainforest Cocoa Bean Madness Game

We have been learning about the Amazon rainforest.  Part of our topic was to create a game.

We brainstormed our ideas on a board about what we might see or come across if you were in the rainforest and then we chose the best ones to make our game.

We decided to make a game where you had to collect cocoa beans as you went through the forest, but you met good and bad things as you went.

We called our game Cocoa Bean Madness.

Firstly we cut out lots of cocoa beans and coloured stones and other bits, which we had printed from the internet.  We used the stones to design the game and we used various bugs, villages and animals as ‘to do’ spots.  We made our own spinner which worked well.   We chose and printed out our own explorers as our moveable piece.  We also decorated the board to make it more colourful, with trees, rivers and other animals and flowers.

img_9777 img_9778 img_9781 img_9782

The rules were, you use the spinner to move around the board and every stone you land on you collect a cocoa bean, but if you landed on a tiger you had to go back to the start, or if you landed on a spider you had to lose all your beans.  If you landed on a village you collected 4 extra beans and if you landed on a parrot you get to go to the nearest village.  The winner was the person with the most cocoa beans when everyone had finished.

img_9783 img_9780

img_0288

It’s a lot of fun to play this game and the coolest thing about it is we created it and made it ourselves.